The following game was scheduled for early January but due to a few personal issues John and I managed to fight this game today, and what a struggle it turned out to be.
For our first game of 2018 I decided to refight The Bloody Lane at Antietam using the scenario that is in the Picketts Charge rule book.It is an interesting scenario that has tactical problems for both sides.
I managed to find a photograph obtained from a rebel dirigible taken in 1862 showing the lane
[okay I may have lied.] The modern image does give a good idea of what the position was like though.
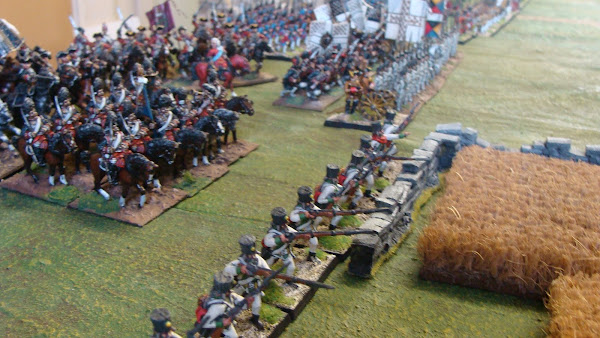
My representation of the Bloody Lane. The table for this game is 10 feet by 6 feet as it was a fairly concentrated affair.
I won the dice roll and opted to be Confederate. The rebels only have four brigades of various sizes. The scenario does allow three of the brigades to be classed as regulars and one Veteran Brigade.My plan was to line the lane with three brigades whilst using my veteran brigade to potentially turn the Union's right flank.
John as Union commander had five brigades of much larger size but the biggest two were all green troops. In the scenario the Union had two rifled gun batteries whilst the Rebels had two mixed batteries. The scenario didnt allow these to be deployed in the lane, which was fair enough given the actual terrain. John's plan was a bit unusual for him as he decided to attack my left wing with two brigades whilst attempting to concentrate on the elbow in the lane with two more brigades. The final brigade covered his right flank, but was tasked with a more passive role.
Any rebel units behind the walls in the sunken lane were allowed an additional causality dice if they fired which allowed me the chance of killing some Union troops.
Unfortunately to start with I kept throwing dice which made my three central brigades become 'hesitant', as a consequence these troops could only fire at short range which allowed the Union to close without causalities. I did however manage to get Rhodes, Veteran brigade to quickly march onto the right flank of the union.
Unfortunately for the Union by some lucky throwing I finally was able to unleash hell in the centre where one of the Green brigades of the Union wilted back towards their starting line.Having a rush of blood I threw the biggest of Anderson's regiments out of the lane to charge the struggling Union. After some initial success John was able to bring close range artillery, skirmishers and and a line regiment to fire on these poor troops. They were subsequently wiped out. A fine lesson there.
On my right John had been able to get a brigade to charge range. Three times he attempted to breach the lane but each time I was able to hold and drive him back with minimal casualities.
Using a flash of tactical brilliance? I maneuvered one of Wrights brigade onto the flank of the Union attacking lines intending to hit them in the flank, only to watch as John got the initiative on me and charge the isolated regiment with two regiments of his dreaded Irish. So outnumbered and without supports my one small regiment was facing extinction.
Only for me to throw this in the charge roll. Even though John had an opportunity due to his one support to re roll one dice he failed and his Irish were forced to run. So the main attack seemed stymied.
In the left centre I was happily chipping away at the Union skirmish line which were very active.John's artillery battery was particularly effective at hammering my static left wing.
On the left, my veteran brigade were making a dog's breakfast of turning the Union flank with regular 'hesitant' throws to stop their forced marches.Eventually I was able to send one of the veteran regiments against John's flank only to watch as they ran away in double quick time. The scenario allowed for 16 moves but by move 9 it was clear that the Union attacks had failed and three of the five Union brigades were no longer battle worthy. John kindly gave me the victory.
A view from the Union centre. As their final attack stalled.
Picketts Charge rules had once again shown why they are not only enjoyable but give a nice historic 'feel' to the games. The scenario isnt a big one, well okay, its quite large, but the rules allow the game to move along fairly quickly and nothing is for certain so there is always a chance of the unexpected but still historical result to a move.
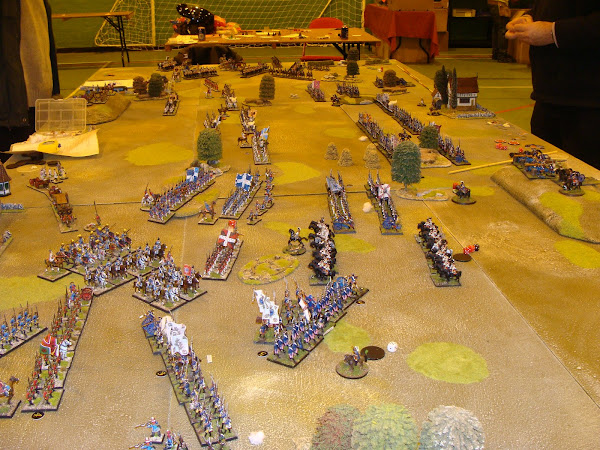
A view from the Union side prior to the start of the deployment.
The Aftermath.