Saturday 23 February 2019

A Seven Years War Encounter using Honours of War [amended]

When Osprey Books released Honours of War by Keith Flint in 2015 I will admit I was very excited. The rules were inexpensive and specifically covered the War of Austrian Succession and the subsequent Seven Years War. The rules were pretty straight forward to use and I particularly liked the command system for the brigadiers and commanders. Overall I thought they were exactly what I was looking for. 

Sadly over a number of battles I began to realise that there were some issues with them as regards the need to constantly withdraw units in order to rally causalities and also what appeared to me the overwhelming power of the artillery. The final straw was during a weekend refight where the Prussian commander created a grand battery of 'Brumbars' [thats 32pdr's which was an historical fact as regards their calibre] and proceeded to dominate the centre of the battlefield literally wiping out any opposing troops who were unable to manouvre out of their long reach. I couldnt blame the Prussian commander although he was using anachronistic tactics but I just felt the balance of the rules were wrong. I simply stopped using my SYW armies and went onto other projects. 
 A couple of year on and we went back to Blackpowder which was fine but somehow I felt just didn't capture the uniqueness of the period. I never said anything but John began secretly working on tweaking HOW. Yesterday he appeared with a set of ideas incorporating Honours of War and Blackpowder. He had asked me to set up a battle using my SYW collection and basically we set to, using the 'new rules.'
 John had kept with the command system from Honours of War and also the national characteristics. So being French my commanders could never be classed as 'dashing' and also had a stronger chance of being classed as 'dithering,' which is not advised. For John I had selected an allied army made up of Hessians and Hanoverians. So his commanders potentially could be better. We used the move and firing ranges and game sequence from How which were fine. The actual firing system was Black Powder with their saving system and a couple of other tweaks. I hope to type up John's work and post it at a later date if anyone is interested because there were other little things that were incorporated into the rules. 

 Anyway on to the battle which involved three brigades of infantry each and two brigades of cavalry plus light troops.Again some of my figures had never been used since they had been painted several years ago. I expected these would rout immediately but was surprised when they didn't.
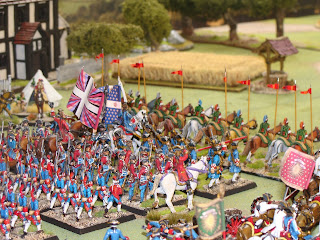
I even got my French guard out, plus some of the household cavalry. I selected a brigade of Wild Geese but gave them no special characteristics. John had the Hanoverian guard plus two battalions of grenadiers. The idea was just to make a balanced game to test the rules.
When we tested for our generals we ended up with Dependable generals and only one dithering general each. Mine officially commanded the French guard! In the preliminary moves John couldn't get his dithering brigade to move even when he attached his C in C who was dependable.He had deployed all his cavalry on his right wing facing my guard which didn't help me to be honest.
What I liked about HOW was the feeling that one was gaming in the Age of Reason period where units maneuvered before they closed in for the kill. John did however allow infantry to actually melee if they wanted. a la Blackpowder. It made the battle even more bloody.

Marshal Saxe was clearly off his game and was only classed as Dependable. I blame his fondness for loose women and port. Still he was better than the Guard commander who was no use for anything and stood around looking confused. 

 My French guard blazed away at the combined Hanoverian grenadiers but couldnt make an impression until in the end I withdrew them intending to use my cavalry to finish the job. It never happened. John simply withdrew the grenadiers and my cavalry failed to move..
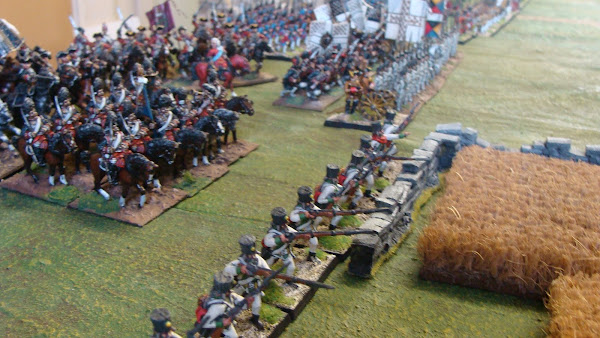
This regiment of Dragoons hit first one disordered unit which routed and then pursued into the Guard Lorraine who had become disordered by the routers.It didnt end well Im afraid. These Lorrainers are Black Hussar figures and had never been used before.

Here a regiment of Hanoverian dragoons hit my poor Irish who failed to stop them with musket fire  and were swept away, one regiment at a time.You will notice that I have managed to send a regiment of French cuirassiers to their aid.
With the demise of the two Irish regiments the Hanoverian just kept on coming and piled into my cuirassiers. Result!  Notice how my regiment are supported by the French Gendarmerie. What could go wrong?
Everything actually. My cuirassiers fought abysmally and routed, they did however mange to stop the Hanoverian cavalry's uncontrolled advance. 

The Gendarmes of the guard seemed to spend the entire game moving from one crisis to another and never actually came to blows with the enemy. So really very accurate I think.
                            Nothing like a bit of overkill. The Hanoverian right wing.

My Scots somehow had to face the onslaught from some cuirassiers who again weren't stopped by musket fire. They did manage to hold on in the melee and turn them back, but it was very close.


My cavalry looked impressive as they moved to support my guard. Sadly they were disappointing and couldnt get to grips with the Hanoverians until it was too late.
Instead of using French hussars I deployed Saxe's bodyguard. They did okay but eventually were forced back due to causalities. They did add some colour to the battle though.
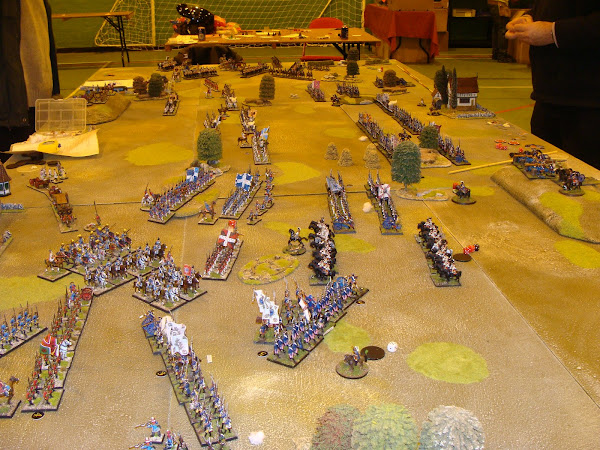
  After four hours of battle my French were on the brink of collapse with two out of three infantry brigades shaken and retreating off the table. I was surprised how John also was on the brink of collapse but through judicious dice rolling had somehow managed to rally some of his foot regiments and hang on. The amended HOW rules worked very well and seemed to redress what I thought used to give an imbalanced game.We soon remembered the original rules and the only anomaly regarding evading light troops was quickly sorted to our satisfaction.All in all a really enjoyable game even though I lost.It looks like I will be returning to HOW albeit the amended version.


 Some Black Hussar figures hiding near the battlefield.


Thursday 14 February 2019

Back in the Saddle.

 Normally I like to keep my blog in chronological order so this post should really be about the Antietam wargame that John hosted for me this week. However it is an image heavy account and I would like to do what was a wonderful game a proper write up. It was a very tense and very very bloody affair, I loved it.


 I have started to paint again imbibed with the enthusiasm I got from the York show. One cant beat a bit of retail therapy to lift the spirits.I had a few plastic union chaps left over so decided to paint them up, of course I had to buy some new Perry command to go with them. These are Pennsylvanian volunteers. I have also been completing the painting of my Renedra purchases. Its quite a sight now and very orderly, so very American.
 I also managed to complete another Royalist regiment for my Hinchliffe project which is now stretching into the use of Warrior and Mini Fig ranges. I can smell the age of these chaps from the keyboard. These are the Duke of York's Foot regiment.Great flags but a static pose I'm afraid.


 Now for some artillery, the red gun and crew are Warrior and very nice they are as well. I've decided if I'm going retro with these armies I might as well go totally retro.
  And yes there is a crew containing Mini Figs which were amongst the box of metal I bought at York, again I really enjoyed painting them.


 I managed to paint up four guns and crew and found in the 'box' two painted limbers which I touched up and brought back to life.
 Finally a regiment of Parliamentarian horse, I really like this pose, very Parliamentarian.


 I havent been neglecting my Grandson either and tackled some 40k chaps. One will need sun glasses for these as I discovered some old bottles of fluorescent paint which I thought would look 'cool.' [See Im down with the kids, yo!]
 So a bit of an eclectic week really. I also received a couple of lovely painted Peter Gilder renaissance horses from the Wargames Holiday Centre which require two appropriate riders AND another converted Gilder? gendarme which I need to base.These were sent by Jason Williams again, so again can I say a big thank you for sending me the pieces. Brilliant. 

Friday 8 February 2019

A Large Seven Year War Encounter.

 I think its nearly three years! since I used some of my Seven Years War collection in a wargame. So yesterday at John's constant harping on I got some of my collection out. Sadly I'm useless at creating a scenario, I have never been able to create something that could be even mildly interesting. I leave that to John. So instead I set up a fairly open battlefield and went for a set piece battle between the French and Austro/Saxons. It turned into quite a tense affair. I opted to leave a cavalry reserve off table that had to be diced for as and when it was requested. The dice was to determine what would arrive, if at all. 1 meaning the reserve wasnt coming and 6 meaning a cuirassier brigade would be arriving. The scores in between were for either dragoons or simple cavalry.

 We tend to use Blackpowder two for the SYW after we gave up on the Honours of War rules.
 Naturally I chose the poor French led by a cart bound Marshal de Saxe. The Austrians were commanded by a lovely female hussar courtesy of the Willie range. I thought we should adopt a more diverse society even in wargaming battles.I allowed the Austrians to have two grenadier batallions and all the Austrian line to be classed as 'large.' I soon learned I was too generous as when it came to fire fights the extra dice proved critical to the game. John attempted to be very aggressive on both wings, but failed twice to move his right wing which should have allowed me to capitalise on his failure. Unfortunately most of my brigadiers were only 7's and the left wing commander also failed his order throws.
 On my right wing the Austrians were more successful and came on against what I thought were my best troops.I was to be disappointed as one after another of my regiments reeld back under a murderous fire from the Austrians.
 I did manage to 'shake two of his regiments and went for a daring'follow me' move using my Wild Geese. Bad idea. The wild geese were literally cooked and with them being shaken the entire right wing of the French were lost and in retreat.
The image below shows the dice roll I threw for my Irish to test their morale.
                                         Guess what, snake eyes isn't very good!


 On the left wing [French] the Saxons had decided to advance flanked by a brigade of cavalry led by some Saxon cuirassiers. I managed to stop the cuirassiers with firepower, but the Saxon dragoons charged into and through my Arqubussiers du Grassin and into the Regiment du Corse who had thrown a double six and blundered forward out of control. Although I shook and broke the Saxon cavalry I lost both my only light troops but also the Corsican's.

 I rolled for my cavalry reserve and managed to get a couple of French Dragoon regiments. The subsequent dice to see where they would arrive plumped them on the wrong wing! Even with the loss of his cavalry John marched his Saxons forward in a large block. Somehow I managed to hold them up and as my light cavalry moved onto their flank and actually forced him back.

To cover the loss of the infantry on my right, I sent in my reserve cavalry intending to charge the shot up Austrians. Ah the best laid plans?

 As I charged with successive dragoon regiments they were shot up and although they were able to actually fight the brigade was effectively spent very quickly.
 Below is an image of the regiment Deux Ponts getting to grips with some Saxons. They were the last regiment remaining on my left wing. Although it sounds like the French were well beaten the Austro/Saxons were also in pretty bad shape but somehow John had managed to rally some of their causalities whilst the French continually failed to do so which caused the collapse of my army.
 It was a great game and very exciting.
I foolishly thought at one stage that I could break the Austrians with uncoordinated cavalry charges. Clearly there is nothing like an old fool.
                                                My wagon train legging it off table.

I had to take this image of a lovely building created by Andy Copestake of Old Glory fame many years ago. A great piece.
On Tuesday John and I are having another crack at the entire Antietam battle, except this time I will be the Confederate and will take my camera.

My 6mm Napoleonic set up.

My 6mm Napoleonic set up.
Austria 1809.

Austrian Hussars

Austrian Hussars
Hinchliffe figures

Austrian Grenzer

Austrian Grenzer
Austrian Grenzer

Smoggycon 2013

Smoggycon 2013
Smoggycon 2013

Smoggycon 2012

Smoggycon 2012
Smoggycon 2012

Smoogycon 2009

Smoogycon 2009
My French getting another beating