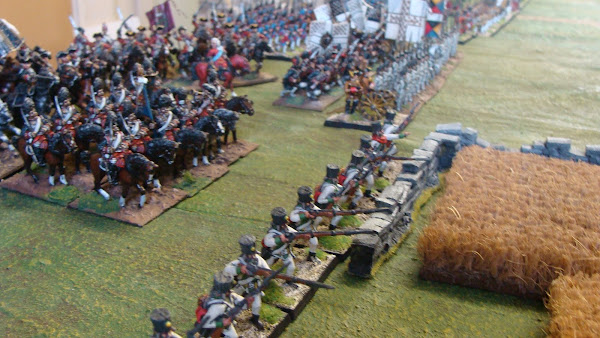
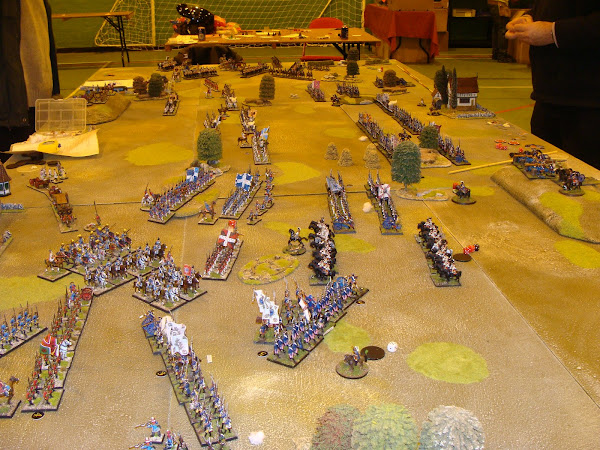
For our first game of 2018 I decided to refight The Bloody Lane at Antietam using the scenario that is in the Picketts Charge rule book.It is an interesting scenario that has tactical problems for both sides.
I managed to find a photograph obtained from a rebel dirigible taken in 1862 showing the lane
[okay I may have lied.] The modern image does give a good idea of what the position was like though.
My representation of the Bloody Lane. The table for this game is 10 feet by 6 feet as it was a fairly concentrated affair.
I won the dice roll and opted to be Confederate. The rebels only have four brigades of various sizes. The scenario does allow three of the brigades to be classed as regulars and one Veteran Brigade.My plan was to line the lane with three brigades whilst using my veteran brigade to potentially turn the Union's right flank.Any rebel units behind the walls in the sunken lane were allowed an additional causality dice if they fired which allowed me the chance of killing some Union troops.
Unfortunately to start with I kept throwing dice which made my three central brigades become 'hesitant', as a consequence these troops could only fire at short range which allowed the Union to close without causalities. I did however manage to get Rhodes, Veteran brigade to quickly march onto the right flank of the union.
Unfortunately for the Union by some lucky throwing I finally was able to unleash hell in the centre where one of the Green brigades of the Union wilted back towards their starting line.Having a rush of blood I threw the biggest of Anderson's regiments out of the lane to charge the struggling Union. After some initial success John was able to bring close range artillery, skirmishers and and a line regiment to fire on these poor troops. They were subsequently wiped out. A fine lesson there.
On my right John had been able to get a brigade to charge range. Three times he attempted to breach the lane but each time I was able to hold and drive him back with minimal casualities.
Using a flash of tactical brilliance? I maneuvered one of Wrights brigade onto the flank of the Union attacking lines intending to hit them in the flank, only to watch as John got the initiative on me and charge the isolated regiment with two regiments of his dreaded Irish. So outnumbered and without supports my one small regiment was facing extinction.
Only for me to throw this in the charge roll. Even though John had an opportunity due to his one support to re roll one dice he failed and his Irish were forced to run. So the main attack seemed stymied.
In the left centre I was happily chipping away at the Union skirmish line which were very active.John's artillery battery was particularly effective at hammering my static left wing.
A view from the Union centre. As their final attack stalled.
Picketts Charge rules had once again shown why they are not only enjoyable but give a nice historic 'feel' to the games. The scenario isnt a big one, well okay, its quite large, but the rules allow the game to move along fairly quickly and nothing is for certain so there is always a chance of the unexpected but still historical result to a move.
The Aftermath.


Enjoyed the AAR, thanks. I have never heard anything other than good about these rules. May I ask what the typical frontage is of your units. I would like to have a go at the scenario, but do not have a 10' table, so would need to scaleback.
ReplyDeleteNorm, I use 50mm square bases for both infantry and cavalry. That was a personal choice because I had loads of these bases left from another project. 40mm square would have been better. Plus all my units are 24 figures, with 6 bases of 4. Ideally that should be about the maximum size regiment, and most should only have 4 bases.
DeleteIt all looks and sounds very impressive, well done Robbie. Antietam is one of the best ACW battlefields to visit if you get the chance. If you refight any other scenarios from it ask me and I'll look out my photos.
ReplyDeleteChris
This battle has fascinated me. The Union had the perfect opportunity to win the war and stop the slaughter yet to come. Macellen showed himself to be a braggart and a fraud. It would be interesting to have seen Grant commanding such a battle.
DeleteSounds like a good game. it certainly looked the part.
ReplyDeleteA good way to start the New Year.
DeleteLooks a very nice game 👍🏻
ReplyDeleteThanks Neil, I think I let your dad off.
Deletespectacular as always.
ReplyDeleteThanks Colin.It played out very well.
DeleteReally enjoyed reading your AAR and seeing the photos of the game, thanks.
ReplyDeleteThanks David, best of luck with your garden design.
DeleteExcellent looking and well-told game!
ReplyDeleteHaving walked the Antietam battlefield and recreated the Federal attack on the Bloody Lane, it is surprising just how close the Federal’s can approach before coming within LOS of Confederate positions. Short range volleys seem appropriate to the situation.
Which is exactly what happened in the game Jonathon. The trouble was that I was able to shuffle supports to where the attacks came, and therefore usually had supports ready when the Union attacks went home. It was a big ask for the Union.
DeleteRobbie
ReplyDeleteGreat looking game and report. Enjoying your ACW project giving me itchy fingers to start again.
Graham,
DeleteDont be taking on any new projects. Get those Saxons done.
Great looking AAR, good to hear it gives a period specific feel, you do know your double six has used up your luck for the rest of the year though?
ReplyDeleteBest Iain
I realised that Iain. Sixes are always at a premium for me.
DeleteRobbie,that sounds like one hell of a game!-terrain and figures are looking good.Is your ACW collection now complete?
ReplyDeletejohnc(william)
It was a nice way to spend a Sunday John. Is a project ever finished? I am beginning to realise how the Forth bridge painters feel.
DeleteI'am glad to read the whole content of this blog and am very excited,Thank you for sharing good topic.
ReplyDeleteMovie Online