John and decided to return to the ACW for this weeks battle after last weeks Carthaginian/Roman blood-fest. I was concerned that after a lay off that I would have forgotten the Pickett's Charge rules so its to the credit of Dave Brown that we were quickly back in the groove and whipping along at a fair rate.
We normally dice for the regiments to see what capabilities they will display, being a Union General it was gratifying to have five brigades which were in the main regular with one inspirational brigadier. A handy thing to have. John's rebels were a more mixed bunch with a fair smattering of 'Old Lags' and mediocre brigadiers.
'Old Lags' was a Paddy Griffith term I believe and described a veteran unit that would do their duty without endangering themselves too much. In the rules they receive two additional firing dice but suffer in a melee so I was confident that I could use my regulars to effect a Union victory. [fool]
My main attack was to be on my right wing where I threw forward my elite brigade commanded by a +1 brigadier. I had high hopes for the attack. John however decided to attack on a broader front led by the 'Old Lag' regiments all in skirmish order. By God were they effective as they mowed down my artillery battery and defended a large area of broken ground against a charge by one of my regular regiments who simply disappeared under a hail of bullets and bayonets. As they disappeared the whole brigade 'faltered' which is not good and causes a paralysis in the brigade.
On my right things were progressing nicely, as John continually struggled to get his 'green' brigade to deploy properly. I still felt fairly confident that I could turn his flank, but after my central brigade faltered I hoped to buy time by throwing in two charges against the rebel centre whilst using all my 'aide' counters[3] to effect a change of brigade orders to close up the gap that was starting to evolve.
It seemed reasonable. What do they say about the best laid plans.
Before things began to go pear shaped............
I foolishly threw forward a 'green' regiment in attack column to help buy some time. The unit simply disappeared under the firepower of the two rebel elite units..
And then this happened....... This is the regiment of regulars that had been ordered to charge against a badly shot up rebel centre. The two ones was my 'Elephant test' for them and naturally is the worst reaction one can have, notice the 11 token. A regiment has 12 strength points to start with.
This disintegration led to this.......The whole brigade leaving the centre wide open.They simply had had enough.
This one rebel battery was manned by men who never missed!
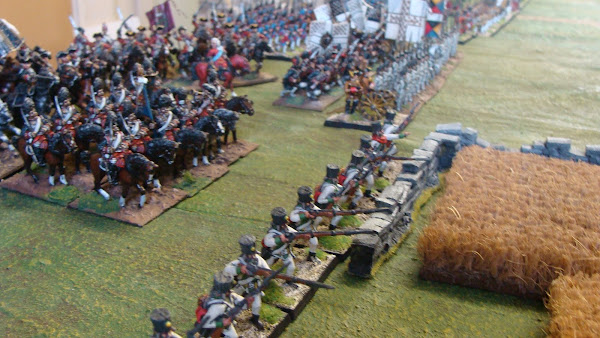
I made the error of placing my 'Old Lag' regiments behind fences expecting the regulars to do all the hard work.
My only real success, as my elite zouaves charged and shattered the rebel flank, a case of too little too late. But what a game. I know I can get carried away with extolling the virtues wargames rules but Dave Brown has produced a great set of rules that encompass fun, skill and a decent amount of historical feel about them.We love them.
At least we captured the train and were able to elicit it use to get back to Washington.


Charging was generally not a good idea during the ACW as you have apparently discovered. 😄
ReplyDeleteJim, I needed to buy time in order to fill the gap in the centre. I forgot just how destructive ACW muskets could be.
DeleteGreat looking game
ReplyDeleteThanks Neil,
DeleteI love a bit of eye candy.
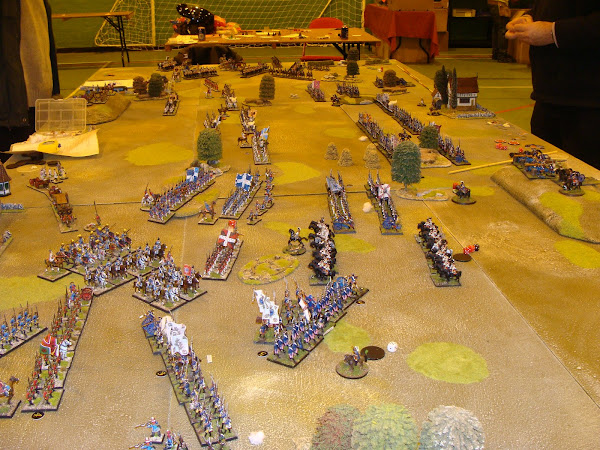
It sounds like the rules gave you a great playing experience and that the 'double one' didn't dent that sentiment. Lovely looking table.
ReplyDeleteNorm,
DeleteThey are great rules and play really well. I could have rolled double six. Well thats how Ive got to view it.
A very Gilder-esque game there! Just the thing for my weary bones. Ahhhhhh. . .
ReplyDeleteBest Regards,
Stokes
Thanks Stokes. Hopefully it wont be long before a put on a more Gilderesque game for your delight.
DeleteLovely pics of a colourful table Robbie, thanks for showing it.
ReplyDeleteNot a problem Chris. After your Quatre Bras extravaganza you would be grabbing a place at Glasgow next year.
DeleteSuch a beautiful looking game!
ReplyDeleteThanks David, I love seeing colourful toys.
DeleteGreat looking game Robbie. I guess the title of this post describes us all.
ReplyDeleteThe name is very apt Colin.
DeleteLovely looking game and sounds like great fun whoever won, although reading your blog it isn't usually you!
ReplyDeleteBest Iain
Iain, I can live with losing Ive had plenty of practice. Its how one loses thats important and it was a tense game until the collapse of the centre.
Delete